Monday, October 26, 2015

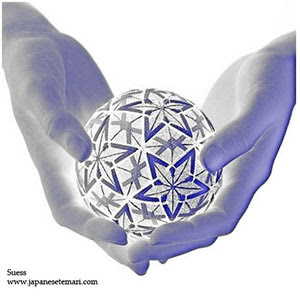
Eight Bridges (Yatsuhashi) done thanks to TemariChallenge!

Thanks to friends on TemariChallenge Yahoo group who stitched a difficult design with me!

Yatsuhashi (Eight Bridges) is one of the designs required for Level 3 (Shihan) certification in the Japan Temari Association curriculum. It's a combination 8 division ball that is covered with stitched threads, an all-over design. There are two different continuous paths that are stitched in a layered fashion. You use doubled thread and have the challenge of needing to work some stitches with your needle turned at angle that is a bit different from normal. All these techniques combine to make this a very challenging design!

This design is from the Japanese book Temari from Different Parts of Japan (Zoku Kyodo no Temari) by Chiyoko Ozaki, ISBN 4-8377-0990-7.

I tried it first with #5 pearl cotton thread and was not happy with the result. While not bad, I didn't like the way the threads piled up so high between keeper pins - unruly thread, rolling this way and that! These are the traditional colors with purple representing irises and the red-yellow progression representing the bridges. The story behind this design is truly fascinating! That's one of the things I love about studying temari - I also learn a bit about Japanese culture and history.


This past weekend I headed to my local needlework shop and found this lovely palette of Vineyard silk. Perfect! Now, I feel that I have truly mastered this design.


Yatsuhashi by Barbara B. Suess


☆*:.。.o(≧▽≦)o.。.:*☆*:.。.o(≧▽≦)o.。.:*☆*:.。.o(≧▽≦)o.。.:*☆

JTA Levels of Certification
Level 1 - Beginner
Level 2 - Advanced
Level 3- Instructor
Level 4 - Master

Thursday, October 22, 2015

Tuesday, October 20, 2015

SPOOKY temari for Halloween

SPOOKY temari for Halloween

Monday, October 19, 2015

Mariana Nelson, an artist with a passion

Last week, my good friend and temari buddy Kathy H. sent me a link to this artist's work. I am amazed! Astounded! Kathy and I are reeling, brain-storming about our own projects that could be inspired by this work.

Art by Mariana Nelson

Saturday, October 17, 2015

Six temari sent to JTA

I sent these six temari to the JTA for my Level 4 (Master) certification application.

Top row from left: Double Star, Snowflakes, Mermaids' Tea Party
Botttom row from left: Grandmother's Garden, Woven Stars, Flower Basket

Japanese Temari for JTA Level 4 by Barbara B. Suess


☆*:.。.o(≧▽≦)o.。.:*☆*:.。.o(≧▽≦)o.。.:*☆*:.。.o(≧▽≦)o.。.:*☆

JTA Levels of Certification
Level 1 - Beginner
Level 2 - Advanced
Level 3- Instructor
Level 4 - Master

Thursday, October 15, 2015

Continuous path stitching is our next lesson

Lesson 8 in JTA course for Level 2.

Continuous line stitching (renzoku) is the technique of stitching several paths around the ball. With each path, you end up back to where you started. Several of these paths combine to complete the design. To demonstrate this technique to students, I designed a new temari with continuous path stitching and a new palette of threads called Lantana. The palette will be available in my Etsy.com shop soon.

Lesson 8 in Level 2 JTA course is all about continuous line stitching.

Wednesday, October 14, 2015

Light in your photos

Morning light coming through an east window makes this temari glow!

"Christmas Puzzle" temari by Barbara B. Suess

Monday, October 12, 2015

My model is not too sure about this てまり

 I'm working on "Eight Bridges" with our TemariChallenge Yahoo group. Finished Step 1 and asked Zoe to pose. She is acting nonchalant but I think she really just wants to go back to sleep!

Zoe being patient with her mama.

Sunday, October 11, 2015

Pineapple temari!

"Pineapple" temari by Barbara B. Suess

Friday, October 9, 2015

Split the coloring on your kiku herringbone designs for a dramatic result

I've been sorting through my photos and organizing. Can you tell? There are so many that I'd like to revisit so will be posting them here for you to enjoy. Perhaps they will inspire your own temari stitching.

When stitching a kiku herringbone design, you can change colors part way through the row. Either end off and begin again with the new color. Or stitch underground to come up near where you will use the same color again. With this technique, you can use two needles, one for each color.


Kiku herringbone stitched with two colors in a temari
by Barbara B. Suess

Kiku herringbone stitched with two colors in a temari
by Barbara B. Suess


Thursday, October 8, 2015

The Language of Temari

Hi!

I'm sure you noticed that English is my native language. When stitching temari, I like to use English words that are translations of the Japanese terms given to us by the Japan Temari Association. There is a good reason for that. Ease of communication promotes learning, discovery, and creativity. Since many of you are probably not familiar with the evolution of temari terms in English, I thought it would be interesting for you to read my experience from the last 15 years of stitching. I've written two web pages on this topic.

The Language of Temari
and
The story behind "kiku herringbone stitching"

The glossary that I compiled was edited and approved by our JTA advisor and mentor. This morning I confirmed with her that they are not asking or requiring us to use terms in Japanese for teaching the JTA curriculum or in presentations of work to be considered for certification. If you find a teacher who demands this, well, you should speak (or write) in Japanese when communicating with that teacher. However, I do not require you speak Japanese and the JTA does not require it either. English is totally acceptable.

I hope you enjoy the back story! I'll be adding more stories about the stitches in the coming weeks. I'll be happy to discuss this topic with anyone who has questions.

Barb

Displaying your temari - another way

Another way to display your temari is in a group made in similar colors with similar designs.
These are stitched with a kiku herringbone using the HHG path.

Wednesday, October 7, 2015

Displaying Temari


Tuesday, October 6, 2015

Rendezvous with Rama?

I like to listen to audio books while stitching and I've noticed that, even though generally I have a poor memory, when I look at a completed temari, a feeling will wash over me. It's the memory of the book! So this experiment that I'm doing with HHG stitching on multi faces will probably evoke the feeling of being in space, inside a cylinder coming to life as it enters our solar system! Rendezvous with Rama is the classic Arthur C. Clarke novel that I am revisiting while I stitch.

Last week, in class at Campbell Folk School, Pam and Karen asked to learn multi center markings and also to learn the path for HHG stitching. We combined them and they stitched an HHG path on a 92 faces temari they had just marked. I had remembered doing this for my book Temari Techniques - it's "Asters" in the book. I remembered that I couldn't completely fill each face by following the HHG path but couldn't remember exactly what I did to make it work. We experimented a bit and Pam (or was it Karen or maybe both!) discovered a very efficient way to make it work. I diligently made notes and vowed to keep track of this technique.

I know you can completely fill in each shape with herringbone stitches following the HHG path on these markings:
C10
32
122

I know this marking does not work:
92

Now that I'm home, I decided to mark some more multi faces temari and experiment with the HHG path. Although I realize there is no particular design difference in a 272 faces temari vs a 362 faces temari that is covered with HHG stitching, I'm overcome with curiosity! The experiment I did about a year and a half ago is much more valuable for seeing the design differences in various multi faces markings. 

I'll report back on my results when I've returned from my with Rendezvous with Rama.


272 faces marked with Neon Green Maxi Lock thread.
C10 to 32. Then multiple of 3 method (M/3) to 92.
Then M/3 method to 272. 
Beginning the HHG path. So far so good!
362 faces marked with Dual Duty pink thread.
C10 to 42. Then multiple of 3 method (M/3) to 122.
Then M/3 method to 362.

Beginning the HHG path. So far so good!

Monday, October 5, 2015

I'm still on a "temari high" from a week at Campbell

Do you follow my Facebook page? I managed to upload photos from the temari class at Campbell Folk School while we were there. And I also put some more temari pictures on my other page - please send me a friend request!

The staff has expanded the wifi connection to the fiber arts studio so I was able to connect to the internet from the classroom. A big step! Thanks, Folk School!!

Dana Watson and I had 12 very talented students. And enthusiastic! They stitched every evening and made great progress in learning lots of new techniques. The philosophy at the school is non-competitive. It's not a place to focus on production and finished lots of pieces. It's a place to learn and when you have that concept down, it's time to move on to something else. This means a students can learn a simple 8 division, wrapped bands, herringbone stitching and pine needles on the first day. Then on day two, learn a simple 10 division, stitch a 5-point star, wrap an obi, and more pine needles with variation. On day 3, it's time for a simple 12 division and the kiku herringbone stitch with starting and stopping point variation. Guess what? Day 4 is for combination divisions! C8 and C10 divisions were tried successfully by many students who arrived on Sunday night without any knowledge of temari making!

Students who came in with temari experience were able to jump to multi faces markings with HHG stitching. Hooray - they did great! Thanks so much to all the students and the the Folk School.

Here are just a few of the photos I took.

Temari by student of Barbara B. Suess

Temari by student of Barbara B. Suess

Temari by student of Barbara B. Suess

Temari by student of Barbara B. Suess

Temari by student of Barbara B. Suess

Temari by student of Barbara B. Suess

Temari by student of Barbara B. Suess

Temari by student of Barbara B. Suess